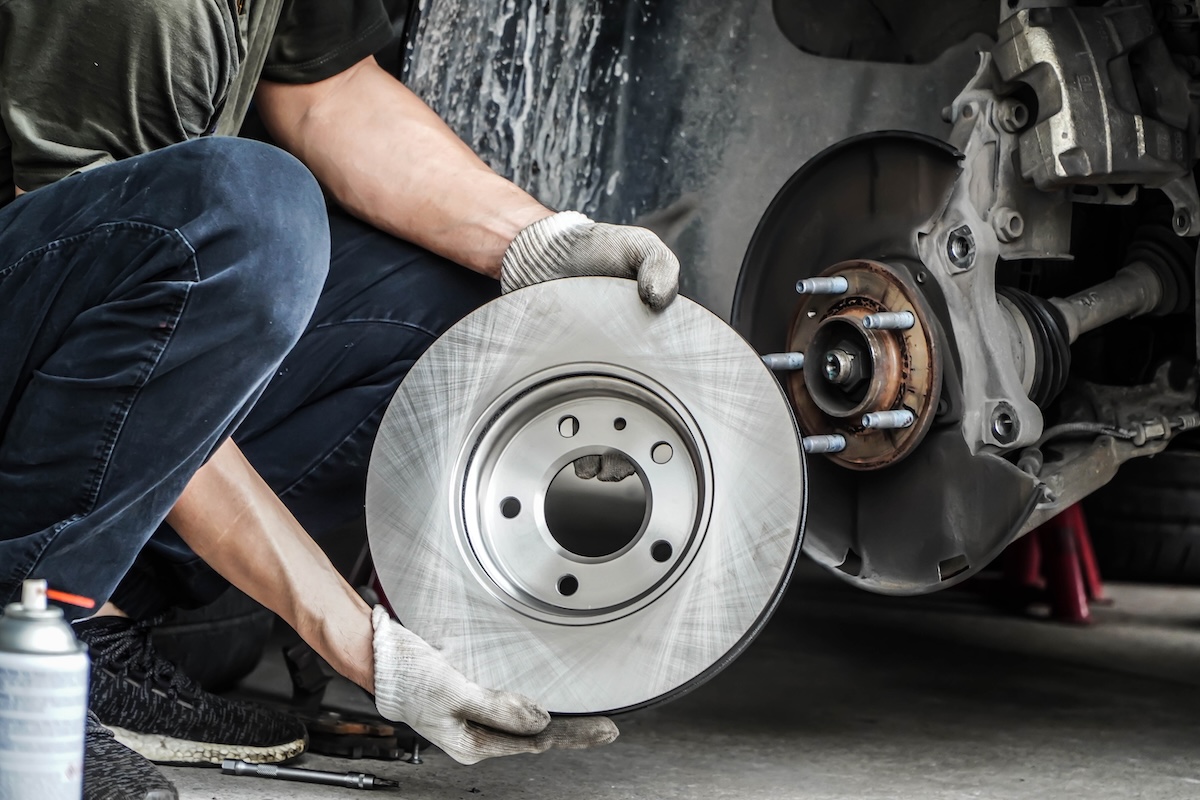
After oil changes, brake rotor and pad replacement is probably the most common repair completed by home mechanics. It’s a relatively easy job to do in your garage or driveway and we have some vehicle-specific tutorials available on our YouTube channel.
At IDParts, we’ve replaced a lot of brake rotors and pads ourselves, along with helping our customers when needed. Based on those experiences, here are some tips and best practices that will help the job go smoothly.

Pick brakes that suit your vehicle & driving conditions
Simple enough, right? Actually, it is. Brake rotors from known manufacturers are all made to high-quality standards, and we see very few warranty issues with brake rotors. So pick rotors that meet your cost criteria and are from a brand that has a good reputation. Our only advice here is to choose rotors that are either painted or coated. They’ll last longer, and they look better on the car during their life because you’re not looking at a rusty hub through your wheel.
Use the right tools
You do need a few more tools to repair brakes than to change oil, but only a few. In addition to metric wrenches, you might need:
- Torx screwdriver: Many cars have rotor screws with Torx heads, so you’ll need this to remove them. Get a good quality tool that fits snugly to help prevent damage to the screw.

- Allen wrenches: Some VWs have caliper carrier bolts with Allen heads, so you’ll need these wrenches to remove them. This may also be true on other cars: check yours before starting the job to make sure.
- Triple square wrenches: Some VWs and Mercedes use triple square bolts on their brake assemblies. Check your vehicle to see if you’ll need them. Some parts stores carry triple squares, although you may have to ask for them.

- Tool to retract caliper pistons: For front calipers, you can get away with large water pump pliers, or you can use a brake piston compressor tool, which makes the job easier. Many rear brakes require the use of a tool that both compresses and rotates the piston, which requires a special tool.

In addition to these tools, you’ll need some silicone-based lubricant for caliper guide pins. Using a little anti-seize on the rotor screws and the rotor mating surface to the hub will make the next brake replacement go more smoothly.

Keep things clean
Brakes live in a pretty hostile environment, especially if you’re located where it snows and road salt is used. Proper brake performance and long service life depend on calipers and pads moving smoothly from coasting to braking and back to coasting. Lubricating guide pins helps, but so does cleaning surfaces, including the wheel hub behind the rotor and the caliper carrier where the pads sit. You should also clean brake pad clips, and replace them if they’re damaged or very corroded. Finally, clean up the caliper carrier before re-installing it, just to make sure the caliper sits squarely and the pads don’t scuff against the rotor or bind in the carrier.

Replace rotor screws
Although you can re-use these screws, they tend to corrode just below the screw head over time. The next time you try to remove them the head might break off. They aren’t expensive, and it’ll save you a lot of trouble in the future if you simply replace them.
Inspect and replace rubber parts
Many cars have boots and caps that protect front caliper guide pins from the elements. These can get soft over time, cause the pins to bind, and caps may fall off. If they are soft to the touch or the pins don’t slide smoothly through them after cleaning and lubrication, replace them.
In the rear, many cars have boots that can protect the rear caliper guide pins and flex when the brakes are applied. These can deteriorate and rip over time, letting moisture and debris get to the guide pins and cause the brakes to drag. Replace if needed.

Pay attention to torque specs
It’s easy to just go ahead and replace brake parts, making sure bolts and screws are “tight enough”. However, paying attention to torque specs can help make the next repair go easier. This is especially important for caliper carrier bolts (pictured below), which seem to get tighter over time, and can be difficult to remove.

Refresh brake fluid
We realize we’re focusing on pads and rotors, but don’t forget brake fluid. Brake fluid attracts moisture, and if not flushed on schedule it can affect caliper life and damage the car’s ABS pump. Most manufacturers recommend a brake flush every two years. When you replace pads and rotors is a good opportunity for a fluid flush.
You’ll probably need 1 or 2 liters of the correct brake fluid for your vehicle (most modern vehicles use DOT 4 fluid), along with a power bleeder to pressurize the system. We have a video on brake fluid flush available here.
Summary
Like all repair jobs, having the right tools and supplies available, along with awareness of what will make for a successful repair and long brake life will make the job go easier. We hope these tips help you service your brakes!
Products used for this job:

1/4-inch E-Torx Deep Socket Set

14mm Triple Square

Brake Piston Compressor Tool

Metalnerd Rear Brake Tool (VW)

Brake Parts Lubricant

Wurth saBesto Brake and Parts Cleaner

Wurth Anti-Seize Copper Paste (10 oz.)