Diesel Purge is a highly efficient fuel injection cleaner for diesel engines. This article is a step-by-step how to on cleaning your injectors with Diesel Purge.
When used properly, Diesel Purge is far more effective than other products, which are typically dumped into the fuel tank, and therefore diluted by the time they reach the injection pump and injectors. We used A4 chassis TDI (ALH engine) 99.5-04 Jetta/Golf/New Beetle for this write-up.
Objective
The objective is to remove the fuel lines at the fuel filter, insert a pair of adapters into the fuel lines, and feed those lines into the can of Diesel Purge. After that, the car is started and runs off the can of DP until almost empty.
Caution
2004 and later TDIs have an in-tank pump to provide fuel from the tank to the engine. You must disconnect power to this pump by either removing the relay or the fuse for the pump before starting the procedure. If you do not the pump will flood your engine compartment with diesel fuel from the tank.
Duration
From start to finish, the process should take approximately 30 minutes, including run time.
Procedure
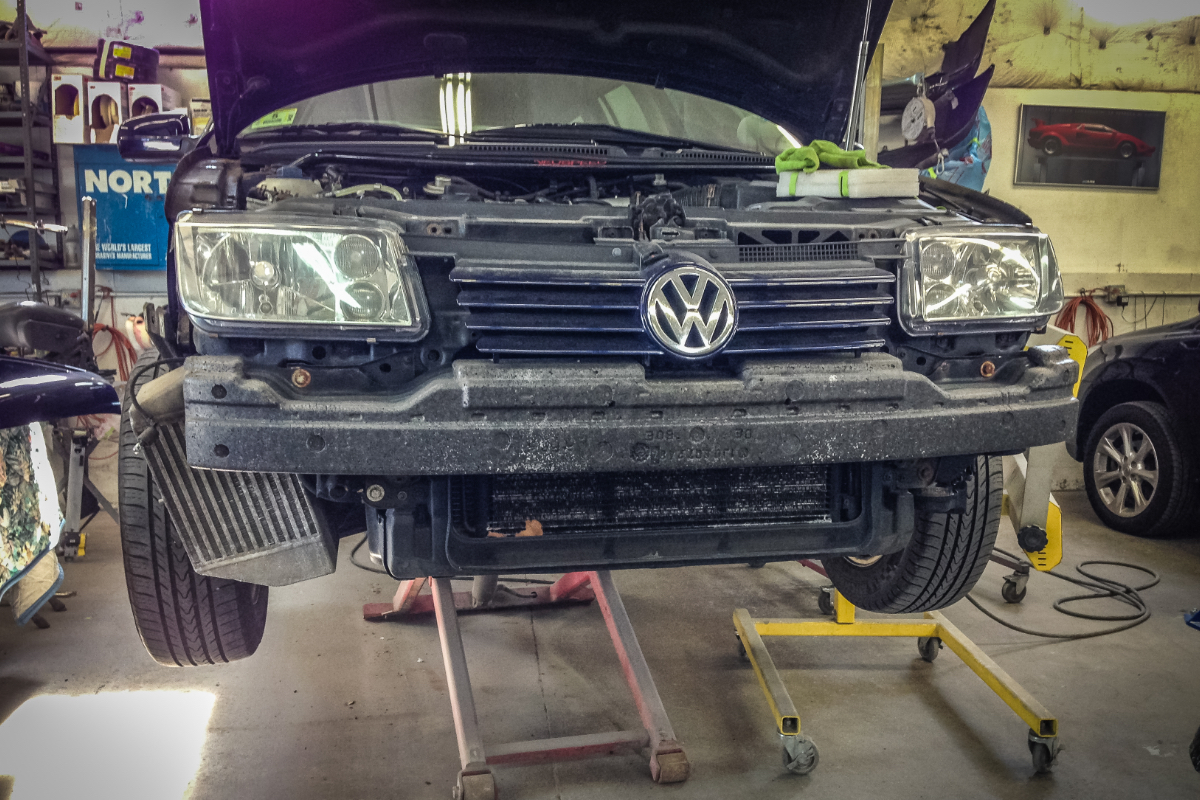
1. Open the hood of the car, and locate the fuel filter, located behind the passenger side headlight.

2. Locate the two black rubber fuel lines that go to the injection pump. Using a pair of pliers or vice grips, squeeze and move the clamps back so that the lines can be carefully removed. You will need to move the clamps approximately 2 inches back on the line, so that they are no longer clamping the nipple on the fuel filter.

3. If the rubber lines do not want to move, even after moving the clamps back, use a special hose tool to remove the lines. If you do not have this tool, carefully nudge them forward with a flat blade screwdriver, being careful not to nick or cut the lines, or damage the plastic nipples on the fuel filter.
4. With the lines removed, insert one of the plastic fuel line adapters you received into each of the rubber lines.
5. Open the can of DP, being careful not to spill it. Place the two lines into the can, and put the can in a safe spot on the engine where it will not tip over. If you can have a helper hold the can, at least initially, that is ideal. Note that as you run off the can, the can will get HOT so make sure your helper is holding the can with a cloth or gloves. Ensure that the lines are at the bottom of the can, where they will not suck air as the can empties.

6. Go inside the car and start the engine. Let the engine idle for the next five minutes. After that, your goal is to run the engine through various engine speeds (RPMs). I like to run it for a few minutes at 1500rpm, then 2000rpm, and so on, going all the way up to around 3500rpm at constant throttle. I also let it idle down completely, then rev it back up to almost redline, then back down again. There is no right or wrong method here, simply vary the engine speeds and run until the can is almost empty (but NOT completely empty!).
7. Either your helper or you must keep an eye on the fuel level of the can, by peeking inside from the top. Since the can is made of metal, it can be hard to see, so some people like to first empty the can into a clear container, or bottle (such as a clean soda bottle). I find that I can tell pretty well when the can is empty, so I don’t find this extra step necessary, but it’s up to you. You should also make sure that the lines are always fully inserted into the can, almost touching the bottom.
8. When you’ve decided it’s time to stop, turn the engine off. Carefully pull the lines out of the can, and then remove the line adapters from each line. Careful, the can and remaining fuel will be hot.
9. You can now reinstall the rubber fuel lines back on the fuel filter, or go ahead and replace the filter, since you’ve done half of the labor already. If you do replace the fuel filter, you can pour the remainder of the DP in the can into the fuel filter, and prime the rest of the filter with diesel fuel, Stanadyne, or your favorite fuel additive.
10. Reinstall the lines onto the filter, make sure the filter bracket is secured (if you replaced the filter), and go start the engine. If the engine does not start immediately, it may take a couple of tries (if air is in the system). Crank for no longer than 5-8 seconds at a time.
11. When the engine is running, let it idle a while and then check for leaks. When you are satisfied that there are no leaks, go for a drive. You will notice that the engine is quieter, there is less smoke, and you may even notice more power!
12. You’re done!
Related Products
Update: Lubro Moly is now offering a professional strength version of Diesel Purge called the “Pro-Line Diesel Injection Cleaner”
Related Articles